The beaches of the Normandy landings
Sous-titre
Normandie, 6 June 1944
On 5 November 1943, Hitler appointed Erwin Rommel inspector-general for the North Sea and Atlantic coasts. As commander of Army Group B, he had under his command the 7th Army, on which the sector stretching from Brittany to the Cotentin Peninsula depended. The Desert Fox was convinced that, once the landings were made, the battle would be decided in two days: the enemy must be pushed back to the sea in the initial hours of fighting, to prevent it from establishing a bridgehead and landing more men and equipment. He therefore undertook to considerably reinforce the Atlantic Wall because, while the German defences were very strong on the coastline of Pas-de-Calais, where it seemed most likely the Allies would land, they were far weaker elsewhere, outside the major ports like Cherbourg and Saint Nazaire, transformed on the Führer's orders into Festungen, or 'fortresses'. Meanwhile, Rommel's superior, Field Marshal Gerd von Rundstedt, commander-in-chief on the Western Front since 1942, regarded the Atlantic Wall as ”no more than a cheap bluff”.
Field Marshal Rommel knew that his mission was crucial to the future of the Reich, and he was determined for it to be successful. As he became increasingly convinced that the Allies would land on Normandy's western beaches, he had the low-lying areas at the base of the Cotentin Peninsula flooded and the defences there reinforced, erecting a second line of coastal defences, laying more mines and obstacles on the beaches, and enclosing the cannons in pillboxes. On the eve of D-Day, in the Overlord area, approximately 200 000 obstacles were scattered from the dunes out to sea: metal barriers from the Belgian defensive line of 1940, oblique-cut tree trunks covered with a steel blade or topped with a mine, and ”Czech hedgehogs” (formed of three metal beams crossed in the middle and set in concrete). Millions of mines were buried, anti-tank walls put up and miles of barbed wire laid. In addition, nearly 2 000 blockhouses were built by conscripted French workers and Italian prisoners of war put to work for the Organisation Todt. Gun turrets from French tanks captured in 1940 were fixed atop concrete foxholes to form ”Tobruks”, named after a battle in Libya. Despite being far apart, these defensive positions prevented any landings at night or at high tide. At low tide, the invaders would be forced to cross a large exposed area, making them very vulnerable. Finally, to prevent gliders from landing, thousands of wooden stakes were driven into the ground at the most likely sites: these were known as ”Rommel's asparagus”. Rommel had around 80 000 men with which to defend Normandy.
On 29 January 1944, he was on a tour of inspection of the Normandy coast. After passing through Colleville-sur-Mer, his convoy stopped on a cliff overlooking the five-mile long beach of Sables d'Or. Hemmed in by tall, steep cliffs, dotted with natural obstacles - including a 65-foot wide embankment of pebbles bordered by a low stone wall - and overlooked by dunes and hills, the beach was favourable to the defenders, provided that it was further fortified. Rommel likened this beach to that of the Gulf of Salerno, where the Allies had landed on 9 September 1943. Turning to Ernst Goth, the commander of the 916th Grenadier Regiment, stationed in the sector, he said: ”Goth, they'll be arriving on your doorstep.” The beach was named Omaha by the commander of the First United States Army, General Bradley.
On the eve of the landings, the SHAEF strategists knew only too well that Omaha Beach would be the most difficult to take, having the terrain least favourable to the assailants. Fifteen defensive positions, or Widerstandsnester, numbered from 60 to 74, were installed, 12 of which dominated the beach, which they had covered with crossfire, hindering access inland. Each position had 50-88mm cannons or a tank turret, machine guns and mortars. At Longues-sur-Mer, four miles to the east, a battery of four 152mm cannons was installed, capable of intervening at Omaha. The sector was defended by 2 000 German soldiers.
However, situated as it was between Utah and Gold beaches, Omaha Beach could not be allowed to remain in German hands. The Allies were therefore relying on the aerial and naval bombardment prior to Zero Hour to inflict as much damage as possible to the enemy defences.
The American beaches: Utah and Omaha
Utah and Omaha beaches were to be captured by the First United States Army, under General Bradley. They were situated on either side of the Vire estuary. In the west, the Utah Beach sector was assigned to the 4th Division. On the morning of 6 June 1944, at 6.30 am, the troops landed one mile to the south of the planned target, due to strong tidal currents which carried the landing craft off course: instead of landing before the dunes of Varreville, they landed at Saint-Marie-du-Mont, where the German defences were weaker. By evening, the Utah landing could be deemed a success: losses were lower than expected - 300 men - and over 21 000 soldiers had gained a foothold on the beach. Exits were opened up for troops and equipment, and a bridgehead was firmly established once they had linked up with members of the 82nd Airborne Division. This positive outcome stands in stark contrast to that of Omaha.
Omaha Beach lay to the east of the Vire estuary. This sector was assigned to the troops of the 1st and 29th Divisions. The aerial and naval bombardments that were supposed to destroy the German defences, considerably reinforced in this sector, completely missed their targets. Meanwhile, unbeknownst to the Americans, the German force had been reinforced with a very good unit, the 352nd Infantry Division, which was well equipped with artillery. The presence of such an intact division on the coast was even more of a cause for concern when the landing did not go according to plan. A heavy swell sank practically all of the amphibious tanks that were intended to reach the shore first in order to support the assault troops and crews of engineers whose job it was to destroy the obstacles. It was all the more unfortunate since the Americans had not deemed it necessary to bring along with them the tanks specially designed by Britain's General Hobart to destroy blockhouses and minefields. What's more, currents carried the assault units off course, some landing as much as half a mile to the east of their assigned sector. As a result, sappers and GIs, mixed and scattered, found themselves operating in sectors other than those for which they had been prepared. Chaos and confusion reigned among the attackers as they landed in the open. The Germans waited for the troops to land before opening fire. The first eight companies of the American 116th and 16th RCT were decimated. Infantrymen tried to take shelter behind the obstacles on the beaches and the bluffs. With difficulty, under enemy fire, the engineers managed to clear a few channels for the landing craft behind them before the tide came in, suffering heavy losses in the process. Most of the first wave's radio equipment was lost, preventing normal communications with the command. To protect themselves, the men tended to regroup in the middle of the beach, making them an easy target for enemy snipers. The first wave to reach the shore was almost totally wiped out. There was such panic that, by 9 am, General Bradley, who was offshore on the cruiser Augusta, had the impression that his troops had suffered an irreversible defeat. He therefore decided to focus on a single beachhead on Utah, and sent a message to the SHAEF requesting permission to send the troops who had not yet landed back to the English coast. It was not until 1.30 pm, in view of the steadily improving situation, that he went back on this plan. Further to the west, the fighting at the Pointe du Hoc was over more quickly, but was equally bloody. By evening, 34 000 troops had landed. The beachhead was three times smaller than originally planned. But the losses were ten times higher than those suffered at Utah: with 3 000 killed, wounded or missing - 30 % of the total Allied losses on D-Day - Omaha had earned the nickname ”Bloody Omaha”. The difficulties encountered by American paratroopers in the bocage (the small fields, high hedgerows and sunken lanes that characterise the Normandy landscape), together with problems arising from flooding in the Carentan basin, delayed the link-up between Utah and Omaha until 10 June.
The Anglo-Canadian beaches: Gold, Juno and Sword
The British Second Army, led by Lieutenant-General Dempsey, began landing at 7.30 am on Gold, Juno and Sword, in a sector stretching some 25 miles from Arromanches, in the west, to Merville, at the mouth of the River Orne, in the east. The objective assigned to it was to take Bayeux, link up with American troops to the west and seize Caen, in order to protect the eastern flank of the invasion. The beaches did not have the same topography as those of Utah and Omaha: here, there were no natural obstacles, no flooded lagoons or high cliffs. In addition, the naval artillery bombardment in preparation for the landings lasted an hour longer than on the American side. The conditions for the approach of the landing craft were therefore relatively good, despite the bad weather. However, a number of landing craft were ripped apart or capsized by defensive obstacles as they neared the shore. And a powerful defensive force awaited them, with ten infantry companies, 50 mortar crews, 500 machine-guns and 90 artillery pieces on the beaches, and 19 infantry companies and 20 batteries guarding the hinterland. What's more, the 21st Panzer Division was stationed in Caen.
In the Gold sector, the British 50th Division suffered only light losses, landing 25 000 troops at a cost of 413 lives. By the end of the day, the British had not managed to link up with the Americans on Omaha, but they did hold the hills around Arromanches and Port-en-Bessin, two and a half miles to the north of their planned positions.
On the orders of General Keller, the nearly 14 000-strong 3rd Canadian Infantry Division landed on Juno Beach, at the centre of the British formation. The Canadians' job was to establish a beachhead between Courseulles and Saint-Aubin-sur-Mer, from where they would then proceed towards the Carpiquet airfield. They were assigned the objective of occupying the road and railway between Caen and Bayeux, which were to be taken by the British.
After bloody combat on the beaches, the Canadians took Courseulles and Bernières-sur-Mer. In the afternoon, they penetrated inland as far as Saint-Croix and Banville. Supported by a tank squadron, the Canadian Régiment de la Chaudière liberated Bény-sur-Mer. It then advanced on and seized the German strongpoint at Moulineaux, a battery with four 105mm cannons, before entering Basly.
By the evening of 6 June, the 24 000 Canadian troops who had landed held firm positions. Yet although the Canadians had advanced further inland than any of the other Allies, General Keller's men had not achieved their D-Day objectives, since the British had failed to liberate either Caen or Bayeux. Canadian losses totalled 805 men, including 300 dead.
Assigned to the 3rd British Infantry Division, Sword was the most easterly of the beaches. Stretching between the towns of Lion-sur-Mer and Ouistreham, at the mouth of the River Orne, the area was divided into four large sectors. Yet its rocky coastline meant that the attack centred mainly on a one-mile stretch between Hermanville-sur-Mer and Colleville. A solid string of seafront villas were made into combat positions, as was the Riva Bella casino, which was fortified. Besides the defences installed on the beach (Czech hedgehogs, mines on stakes, etc.), anti-tank walls and a large ditch prevented the attackers from penetrating. Further inland, batteries were installed, targeting the mouth of the Orne. Four major fortified positions complemented by pillboxes were set up near Ouistreham and Colleville.
Two hours before the landing commenced, an intense aerial bombardment began, followed by a naval bombardment that destroyed the batteries at Villerville, Houlgate, Benerville and Ouistreham. The Merville battery, which swept the Orne estuary, was captured by paratroopers of the 6th Airborne. Last of all, the beaches were systematically shelled.
In heavy swell, the landing craft offloaded two battalions of amphibious DD tanks of the 22nd Dragoons. These were Sherman tanks fitted with propellers and a rubber ”flotation screen” enabling them to float. Eighteen out of 40 sank or were destroyed by mines or enemy gunfire. Other special tanks were also offloaded, such as Sherman Crabs equipped with rotating chains designed to detonate the mines buried in the sand, and Churchill Crocodiles fitted with flame-throwers.
Twenty landing craft then brought ashore the troops of the 1st South Lancashire and 2nd East Yorkshire regiments. The attackers were mown down by German gunfire. It was these in initial assault waves that Sword suffered its heaviest losses.
At 7.30 am, the 177 troops of the Kieffer Commando, the only French land force to be present, landed and immediately regrouped in the ruins of a holiday camp. The attackers took cover behind the dunes or the anti-tank wall bordering the road, crossed the lines of barbed wire and made a dash for the first rows of houses, under enemy fire.
The landing of the 1st Special Service Brigade remains associated with the memory of piper Bill Millin, who at Lord Lovat's request played ”Highland Laddie” then ”The Road to the Isles” in the thick of the fighting. He would do the same, later, at Pegasus Bridge.
The narrow stretch of beach separating the shoreline from the first rows of houses put the Allies at a disadvantage, as they received a hail of shells and machine gun fire. But the enemy fire gradually lessened, enabling the troops to land more quickly.
As the tide came in, diminishing the area of dry sand, the beach, cluttered with a motley assortment of equipment and wrecked vehicles, became so congested that the landings had to be interrupted for a time. Numbers of wounded could not be evacuated and many of them drowned. It was not until around midday that the beach was properly cleared, as the engineers slowly cleared some paths through, so that operations could be resumed.
In the meantime, the Kieffer Commando succeeded in surrounding the Riva Bella casino and driving out its defenders. In this same sector, the 2nd East Yorkshire Regiment took out the Riva Bella fortified battery and made it to the harbour. The 1st Special Service Brigade was able to be deployed in the countryside and advance on the bridges over the Orne, coming up against sporadic defence. No 6 Commando headed for Pegasus Bridge, defended against the Germans by members of the 6th Airborne. The commando reached the bridge at noon, followed by the rest of the brigade, so that the link-up was successful.
By the evening of 6 June, the Allies had a bridgehead five miles deep. They had reached as far as Varaville, Biéville and beyond Ranville. Fortified positions were established. In this way, Hermanville, Colleville and Ouistreham were liberated with fewer losses than expected: 28 000 troops landed, and 630 were killed, wounded or missing.
Yet although various objectives were achieved in this way, the resistance put up by the German troops prevented the 185th Brigade from completely linking up with the Canadian troops who landed at Juno Beach, and the city of Caen was far from surrounded. A press conference for Allied war correspondents had been scheduled in Caen for 4 pm, but it would not take place until 6 July, when the city was finally liberated.
Altogether, by the evening of 6 June, 156 000 Allied soldiers had a foothold on Norman soil, at a cost of 10 000 dead, wounded or missing, considerably lower than the command's estimate of 25 000 probable losses. Around 3 000 Norman civilians were killed in the bombardments. German losses are estimated at between 4 000 and 9 000.
Vue aérienne de navires de la Royal Navy massés au large de l'Ile de Wight avant de se diriger vers les plages normandes. Copyrignt Imperial War Museums (A 237 20 A)
6 juin 1944 - Vue aérienne de la flotte alliée au large d'Omaha. Copyrignt Imperial War Museums (MH 24887)
6 juin 1944 - Vue aérienne du secteur de Gold durant le débarquement de la 50e division britannique. Un fossé anti-chars est visible sur la gauche, en face de Ver-sur-Mer. Copyrignt Imperial War Museums (MH 24887)
Commandos de la Royal Navy s'apprêtant à faire exploser des hérissons tchèques posées sur les plages par les Allemands. Date et lieu inconnus. Copyrignt Imperial War Museums (A 23992)
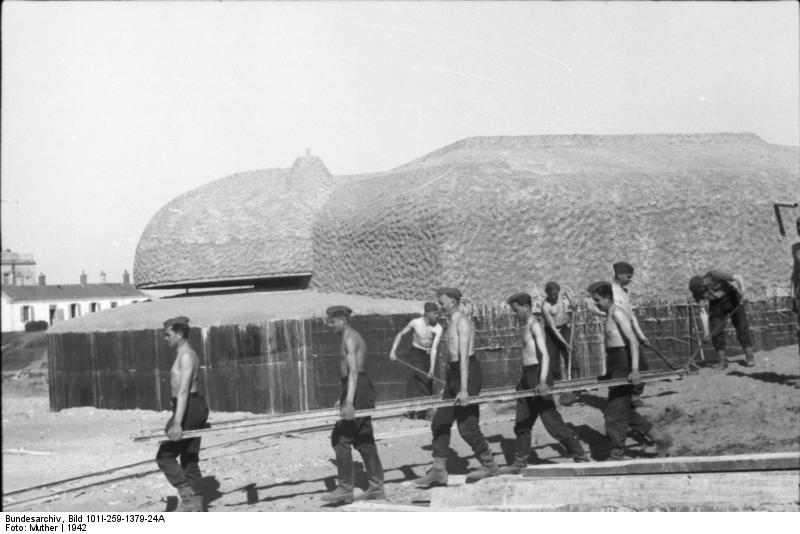
Montage d'une pièce d'artillerie dans un buker allemand du nord de la France, le 21 juin 1943. Copyright Bundesarchiv
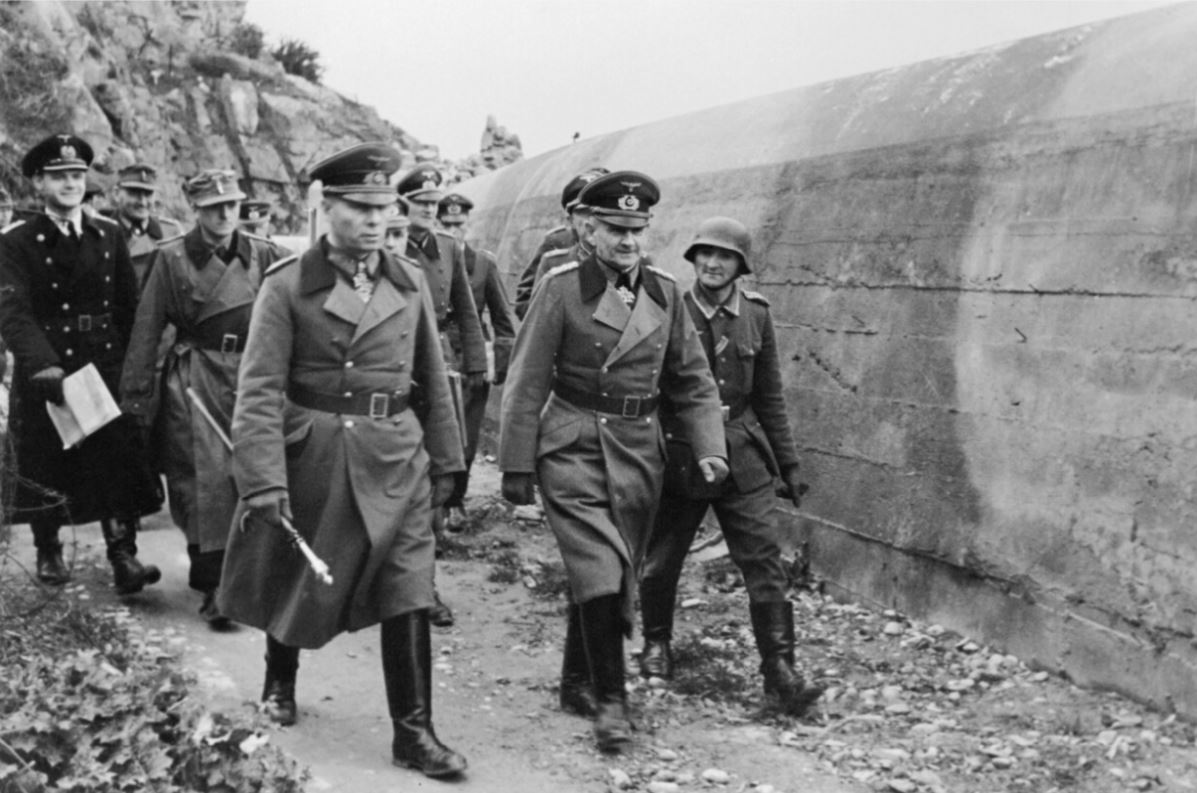
Le maréchal Rommel, à gauche, inspecte les défenses allemandes du Mur de l'Atlantique. Date inconnue. Imperial War Museums (HU 28594)
5 juin 1944 - Un convoi de barges de débarquement transportant troupes et véhicules des 13e et 18e Royal Hussars vogue vers la Normandie. Imperial War Museums (B 5108)
6 juin 1944 - Le HMS Orion fait feu sur des positions allemandes sur les côtes normandes. Imperial War Museums (FLM 4021)
6 juin 1944 - Troupes canadiennes de la 3e division débarquant à Bernières dans le secteur de Juno Beach. Copyright Archives nationales du Canada, Phot. G. Milne (PA 137013)
6 juin 1944 - L'infanterie canadienne débarque sur la plage de Juno Beach et marche en direction de Bernières-sur-Mer, le 6 juin 1944. SourceL'infanterie canadienne débarque sur la plage de Juno Beach et marche en direction de Bernières-sur-Mer. Copyright Archives Nationales du Canada.

6 juin 1944 - Photo aérienne du débarquement sur Mike Beach, dans le secteur de Juno, à l'ouest de Courseulles-sur-Mer. Copyright Imperial War Museums (CL 41)
6 juin 1944 - Photo aérienne montrant la jonction des troupes britanniques entre les plages de King Red et de King Green, dans le secteur de Juno. Copyright Imperial War Museums (CL 3947)
Le général britannique Percy Hobart, inventeur des chars modifiés dits Funnies. Copyright Imperial War Museums (H 20 697)
Char amphibie M5 ou M3 Stuart DD (Duplex Drive) munie de sa jupe imperméable en caoutchouc qui assure sa flottaison. Copyright Imperial War Museums (H 35181)
Char amphibie Sherman DD (Duplex Drive) utilisé sur les plages du débarquement. Copyright Imperial War Museums (MH 3660)
Char Bobbin, qui déroule un tapis de toile pour pouvoir avancer sur le sable mou. Copyright Imperial War Museums (H 37859)
Char Fascine destiné à combler les fossés anti-chars en y déversant des fagots de bois. Copyright Imperial War Museums (H 29043)
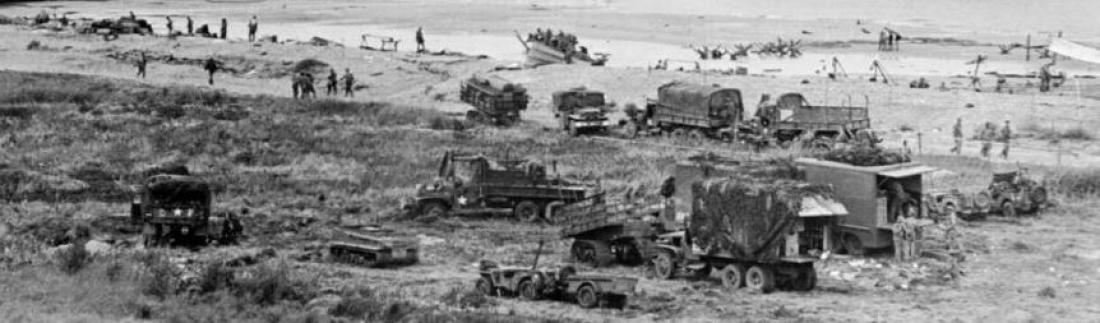
Une plage bondée de véhicules de différents types, peu après le débarquement. Copyright Imperial War Museums (A 23947)
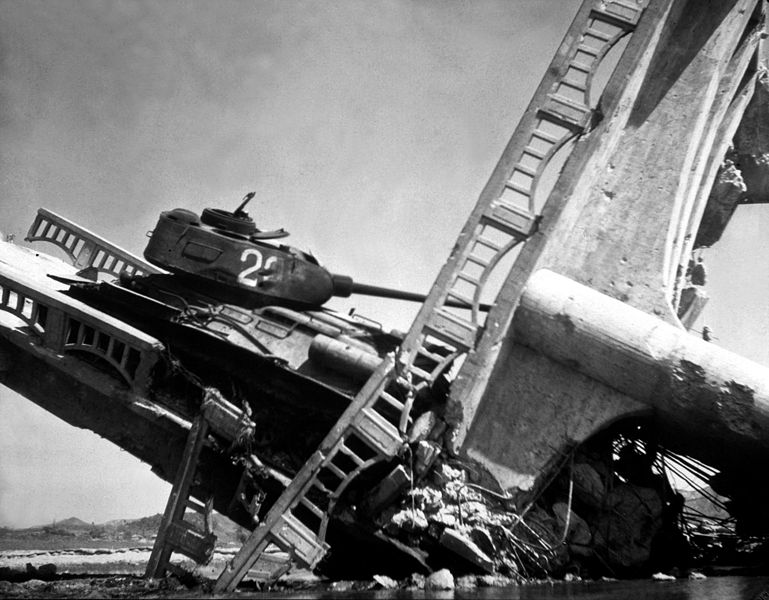
Un char M3 Stuart britannique détruit sur une plage après le débarquement - Date inconnue Copyright Imperial War Museums (A 23946)
Sword Beach, la percée des Alliés - Copyright SGA-Com (Ministère des Armées)