Battle of El Alamein, October-November 1942

The Battle of El Alamein remains the most famous Allied victory in North Africa, against the German and Italian troops of Field Marshal Rommel.
It came in the second phase of the war, when the Allies had halted the Axis forces in Egypt and were seeking to drive them out and defeat them in North Africa, an essential stepping-stone to the liberation of Europe. El Alamein is an Egyptian coastal town, roughly 70 miles west of Alexandria. The front line lay perpendicular to the coast and stretched into the desert interior, which was difficult to access for both adversaries. One of the remotest positions in the desert was held by elements of the Free French Forces.
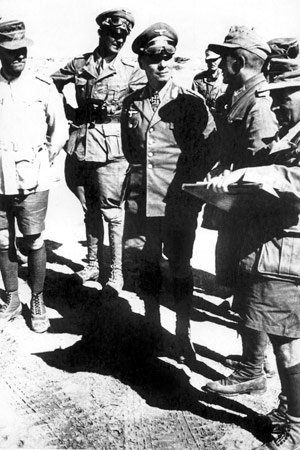
1942 Rommel in the Libyan desert, Source: SHD
Rommel’s forces were comprised of eight poorly equipped Italian divisions and four German divisions, totalling 110 000 men, 500 tanks and 700 aircraft. Facing them, the Eighth Army, commanded by General Montgomery, had 200 000 soldiers, 1 000 tanks and 750 aircraft.
Allied superiority was further increased by the possibility of replacing any losses with reinforcements based in Egypt. The Axis powers, on the other hand, were unable to bring in new troops and hardware from Crete or Europe.
The Allies’ objective was to break through the German front with a brutal tank thrust, forcing the Afrika Korps and the Italians to retreat, then catch them in a pincer movement with the Anglo-American troops who had landed in Algeria and Morocco on 8 November.
Rommel’s last hope was to regroup his forces and hold out until the requested reinforcements arrived
On 23 October 1942, after gaps had been opened up in the Axis minefields, a tremendous artillery bombardment signalled the start of the battle. The Allies advanced with difficulty and Rommel’s return to the head of his troops on the 25th saw a stiffening of German-Italian resistance. The breakthrough Montgomery had hoped for did not occur.
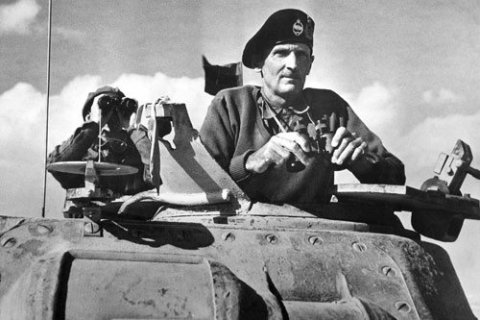
General Sir Bernard Montgomery. Source: Imperial War Museum.
On 28 October, he decided to reorganise his formation and deploy reinforcements to replace what were considerable losses. Then, he battered the enemy repeatedly, subjecting it to increasing pressure on the main line of the advance. The German-Italian lines began to give way and Rommel was forced to field his meagre reserves.
On 2 November, Montgomery launched a new breakthrough offensive. His troops, followed by tanks, made progress despite desperate resistance from the Germans. Noting the state of exhaustion of his forces, Rommel prepared to retreat. On 3 November, Hitler refused, but the following day, he was forced to accept the inevitable. The same day, Rommel’s defensive formation gave way. Many Italians were taken prisoner and the last remaining German troops began their “savage retreat”, initially to Benghazi, Libya.
But in view of the danger of being caught in a pincer movement between the Eight Army to the east and the Anglo-American troops and Army of Africa to the west, Rommel decided to head for Tunisia, where General von Arnim’s German-Italian army was fighting.
Following a difficult campaign, the Allies succeeded in driving the Germans and Italians out of Tunisia and Africa in early May 1943. This victory in North Africa coincided with the Soviet victory at Stalingrad. This period of the Second World War, between November 1942 and May 1943, constitutes a turning-point: from then on, it was a steady decline for the Axis forces.
French participation in the Battle of El Alamein, 23 October to 15 November 1942: the Battle of El Himeimat, 23-24 October 1942
In October 1942, the Free French joined General Montgomery’s Eighth Army, and the 1st and 2nd BFL made their way to El Alamein.
Montgomery wanted to break through the German-Italian defences with a massive infantry attack in the north and a diversionary attack in the south, in the sector of the El Himeimat massif, which dominated the battlefield. Despite General Koenig’s objections, the 1st BFL was tasked with this operation.
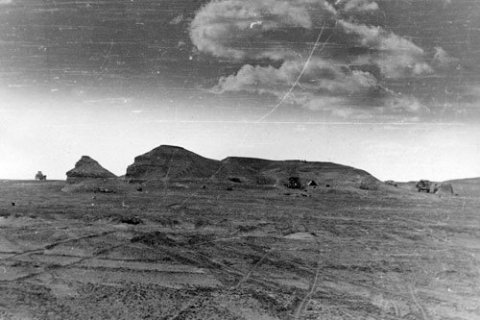
El Himeimat: view of the battlefield. Source: Musée de l’Ordre de la Libération
On the night of 23 to 24 October, after a long approach march, the 13th Demi-Brigade of the Foreign Legion (DBLE), commanded by Lieutenant-Colonel Amilakvari, attacked El Himeimat. Around 2 am, the 1st Battalion of the Foreign Legion (BLE) launched the assault. The fighting was particularly difficult against the Italian paratroopers of the Folgore division, supported by German artillery and tanks. At 6 am, it was the 2nd BLE’s turn to attack. The 1st BLE came under a violent hail of artillery fire, while a counter-attack from German tanks forced the Legionnaires of the 2nd BLE to retreat. Around 8 am, an armoured group coming from the west attacked the 1st BLE. At 9.25 am, Amilakvari had no choice but to give the order to retreat. Bringing up the rear through the minefields, Amilakvari was mortally wounded in the head by shellfire.

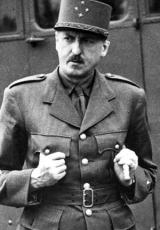
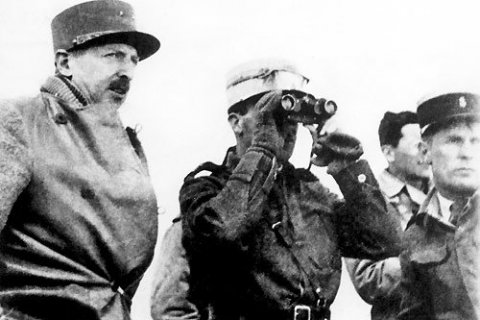
Lieutenant-Colonel Amilakhvari at El Tahag, 10 August 1942. Source: Musée de l’Ordre de la Libération
Exhausted after fighting through the night, the Free French reached Qor El Laban in the early afternoon. French losses amounted to 23 dead, including two officers, and 100 wounded, including eight officers.
On 4 November, Field Marshal Rommel obtained permission from the Führer for his troops to retreat to Benghazi, Libya. The British rushed the German lines, while the Free French of the 1st and 2nd BFL, who had been fighting in the British 50th Infantry Division since 23 October, went on with their reconnaissance and harassment operations until 15 November. They then went into the reserve, where they were employed in watch and recovery duties. Only the Marine and Pacific Infantry Battalion (BIMP), from 22 November, and the “flying column”, from 4 December, pursued the retreating German-Italian forces as far as Tunisia.
While French participation in the Battle of El Alamein may have been limited in terms of actions and troop numbers, it is of symbolic importance since it represents the engagement of Free France alongside the British in North Africa.

The El Alamein battle plan. Source: MINDEF/SGA/DMPA
According to service records, the following units of the Free French Forces participated to varying degrees in those operations:
- the 13th Demi-Brigade of the Foreign Legion (1st and 2nd Battalion of the Foreign Legion)
- the Marine and Pacific Infantry Battalion
- the Battalion of Naval Fusiliers
- the 1st Artillery Regiment
- the 1st March Regiment of Moroccan Spahis
- the 1st Tank Company
- the Hadfield-Spears Ambulance
- the Light Surgical Ambulance
- the 1st Transport Squadron
- Signals Company
- Repair Company
- Engineering Company
- the 5th and 11th March Battalions (2nd Free French Brigade)
1st BFL Order of Battle, 23 October 1942, El Himeimat region
Brigade commander: General Koenig
Army staff and headquarters
Chief of staff: Lieutenant-Colonel Masson
1st Signals Company
General Koenig and his officers in Bir Hakeim. Source: SHD
Group A
Commander of the group and of the 13th DBLE: Lieutenant-Colonel Amilakvari
Deputies: Captains Arnault and Saint Hillier
1st Battalion of the Foreign Legion: chef de bataillon (major) de Bollardière
22nd North African Company: Captain Lequesne
2nd Battalion of the Foreign Legion: chef de bataillon (major) Bablon
One section of three Crusader tanks of the 1st Company
One section of three armoured cars and one section of three autocannons of the 1st RSM
An engineer detachment
Group B
Commander of the group and of the Marine and Pacific Infantry Battalion: chef de bataillon (major) Bouillon
A section of the 1st Artillery Regiment
An anti-aircraft section of the 1st Battalion of Naval Fusiliers (BFM)
An engineer section
Group C
Commander of the group and of the 1st Artillery Regiment (RA): Lieutenant-Colonel
Laurent-Champrosay
British 3rd Artillery Regiment
2nd Anti-Tank Company: Captain de Sairigné
1st Battalion of Naval Fusiliers (motorised anti-aircraft unit): capitaine de corvette (lieutenant commander) Amyot d’Inville
A British anti-aircraft battery (42nd Indian Artillery Regiment)
Group K (“flying column”)
Commander of the group and of the 1st March Regiment of Spahis: chef d’escadron (squadron leader) de Kersauson
1st Crusader Tank Company: Lieutenant Divry
One squadron of five platoons of three armoured cars and one platoon of three 75 mm autocannons of the 1st RMSM: Captain Morel-Deville